SUPER-DUPER Update: I’ve completed a 2.5 hour course on how to use the NEW Variable Importer 8.0 script, and it’s available on Lynda.com! Click to check out more info on the Adobe Illustrator Variable Data Lynda.com course!
And now back to our regularly scheduled blog post…
If you’re familiar with InDesign’s Data Merge, you know how it can take your one design, then “build” the page by creating as many of those designs as it can on your page, at which point it will create a new page and continue building until it has enough pages for all of your data.
Illustrator’s Variable Data feature won’t do this, but we can get pretty darn close by using the Variable Importer script, along with another script by the same developer simply called “RenameArtFromText”.
I made a video for this procedure a long time back (shown above), but I never did officially write it up. So here it is, in case writing it will make it easier for people to find.
For those of you who have no idea what the heck I’m talking about, this article will build on my previous article introducing the Variable Importer script for Adobe Illustrator. If you haven’t already seen that one, go check it out and then get right back here to pick up some more tips.
This method is a little involved at first, but trust me, it can save a ton of time down the line – so hang in there with me for awhile.
Get The Rename Art From Text Script
We’ll need to grab this script in order to make things easier on us later. It helps us to match the names of our Illustrator objects to the names of the headers we’ll use in our imported .csv file. All it does is rename your Illustrator objects according to the text you have in a separate text file.
I asked Vasily Hall, the creator of the Variable Importer script, to make this extra script because I realized it would make this whole multiple dataset thing go a lot smoother. Luckily, he was able to create it pretty quickly.
To get it, go to www.variableimporter.com, which will take you to the home of Vasily’s scripts on GitHub.
You’ll see a few items listed here, the one we want is just called “RenameArtFromText.jsx”.

NOTE: This article is based on the “legacy” version of the Variable Importer script, which you should see there named “Legacy-VariableImporter_v7.1.3.jsx”. Even if you’re using the newer version, the principle of the method will remain the same.
As a warning, don’t just right-click the “RenameArtFromText.jsx” and save, because that’s not actually the script itself, it’s only a link to the page for that script.
For now, just click on “RenameArtFromText.jsx”. This will take you into the individual page for the RenameArtFromText script.

In here, click the “Raw” button. This will bring up a page that contains the raw code of the script.

From here just “Save as…” from your browser to download.
You’ll want to save this file (or move it after downloading) to the Scripts folder of your Adobe Illustrator Installation.
On my Mac, the location of the Scripts folder is:
/Applications/Adobe Illustrator CC/Presets/en_US/Scripts (yours may also be inside a “en_GB” folder or other if you have a different language installed).
On the Windows installs the path should be
\Program Files\Adobe\Adobe Illustrator CC\Presets\Scripts
Once the script is in that location, you’ll need to restart Illustrator so that it’s loaded and available when you open the program.
As long as it’s in that folder, you’ll be able to load it from within Illustrator by choosing File > Scripts > RenameArtFromText.
But now that we’ve got it loaded, we need to set up our Illustrator file, and prepare the csv for multiple datasets on a page.
Setting up the Illustrator Graphics
For those of you who want to follow along, I’ve included the files for this exercise in a zip file you can download here:
Super Business Card Variables MULTIPLE-Sample Files
All the files are in their beginning, unfinished state. I’ve included CC, CS6, and CS5 versions (you CS5 users won’t be able to import the images unless you’re using CS5 15.0.2).
You’ll likely have to change the fonts, but what font is used isn’t important for the variable data feature to actually work.
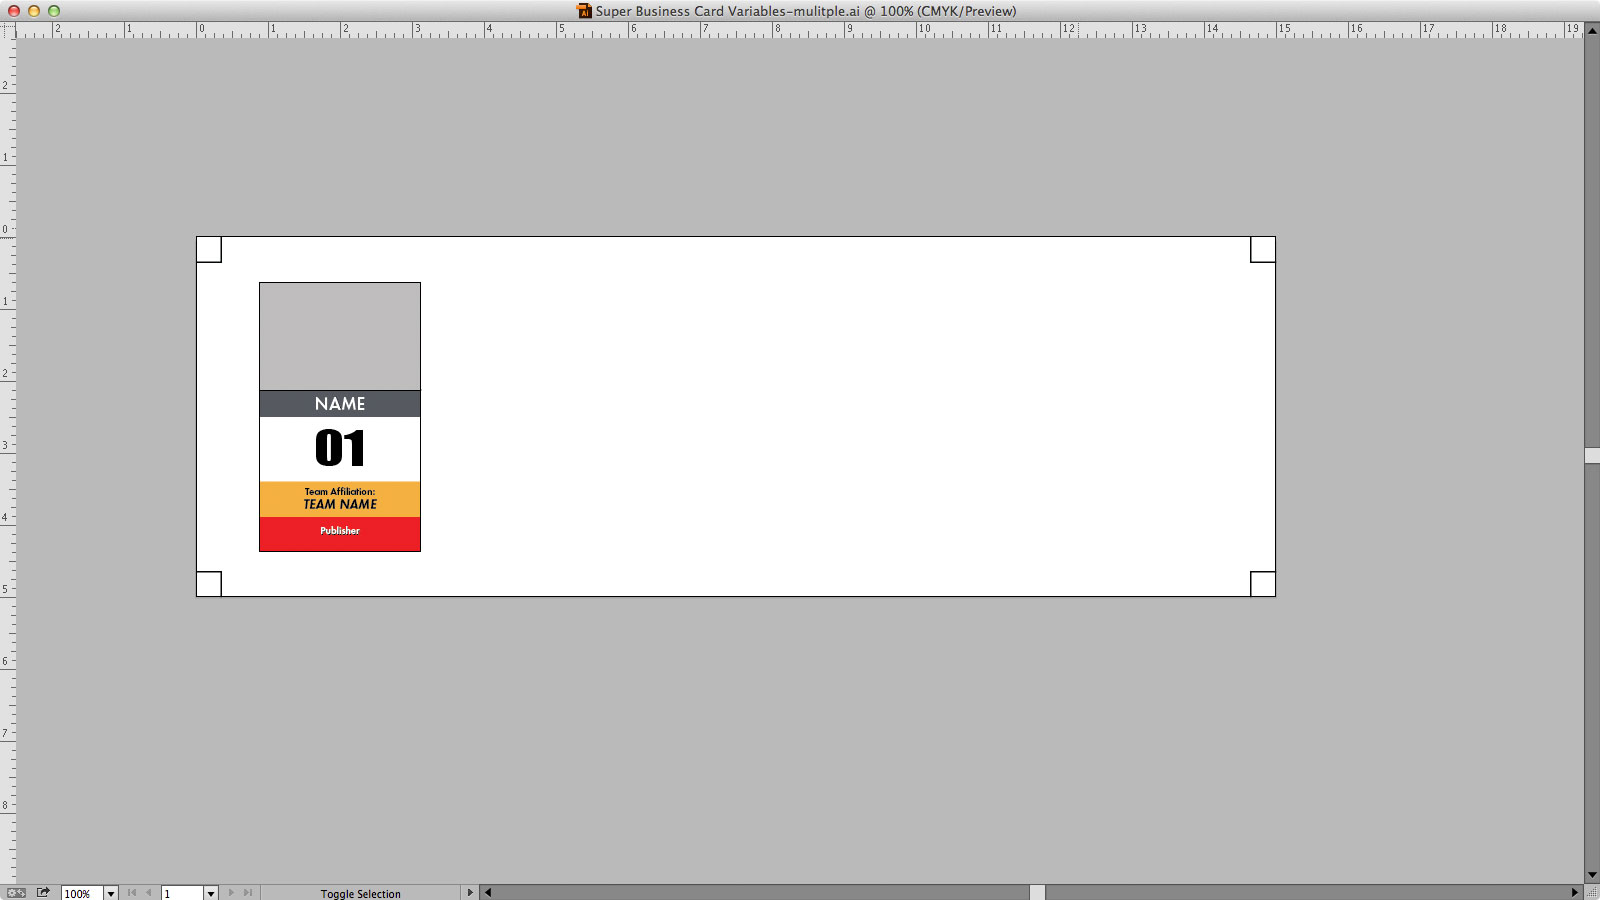
Anyway, my Illustrator file consists of the same super-hero cards I’ve used in the past to demonstrate the variable data feature. But this time instead of one instance of the card, I’m going to have 5 cards up on the same page. We can see in my screenshot that I’ve increased my artboard size to accomodate 5 cards.
Now, I’ll just select the card artwork and press the Return/Enter key. This brings up the Move box, and in the top Horizontal field, I’ll type a value of 2.75 in, then press the “Copy” button at the bottom to create a new copy of that art 2.75 inches away from the first one.
With that done, and with my art still selected, I just need to invoke the “Transform Again” function by choosing Object > Transform > Transform Again from the top menu, or pressing Command-D (Control-D on PC) 3 more times to make 3 more copies, which will fill up my artboard.
So now I have 5 copies of my card graphics, but we’re still not quite ready. If we take a closer look at the anatomy of my design here, we can see that each element of my design is placed on it’s own Layer.

This isn’t strictly necessary, but it helps to keep all the elements organized, especially when you have a large amount of objects and variables. But now, we’re actually going to need to get at the objects that are on the Layers, not the Layers themselves.
To do this, in the Layers panel, I’ll click the “disclosure triangle” to the left of the Layer names. This will reveal all of the objects that are on those Layers. There will be 5 objects on each Layer, since I created 5 card designs, and separated the elements by layer. This is what you would expect to have at this point.
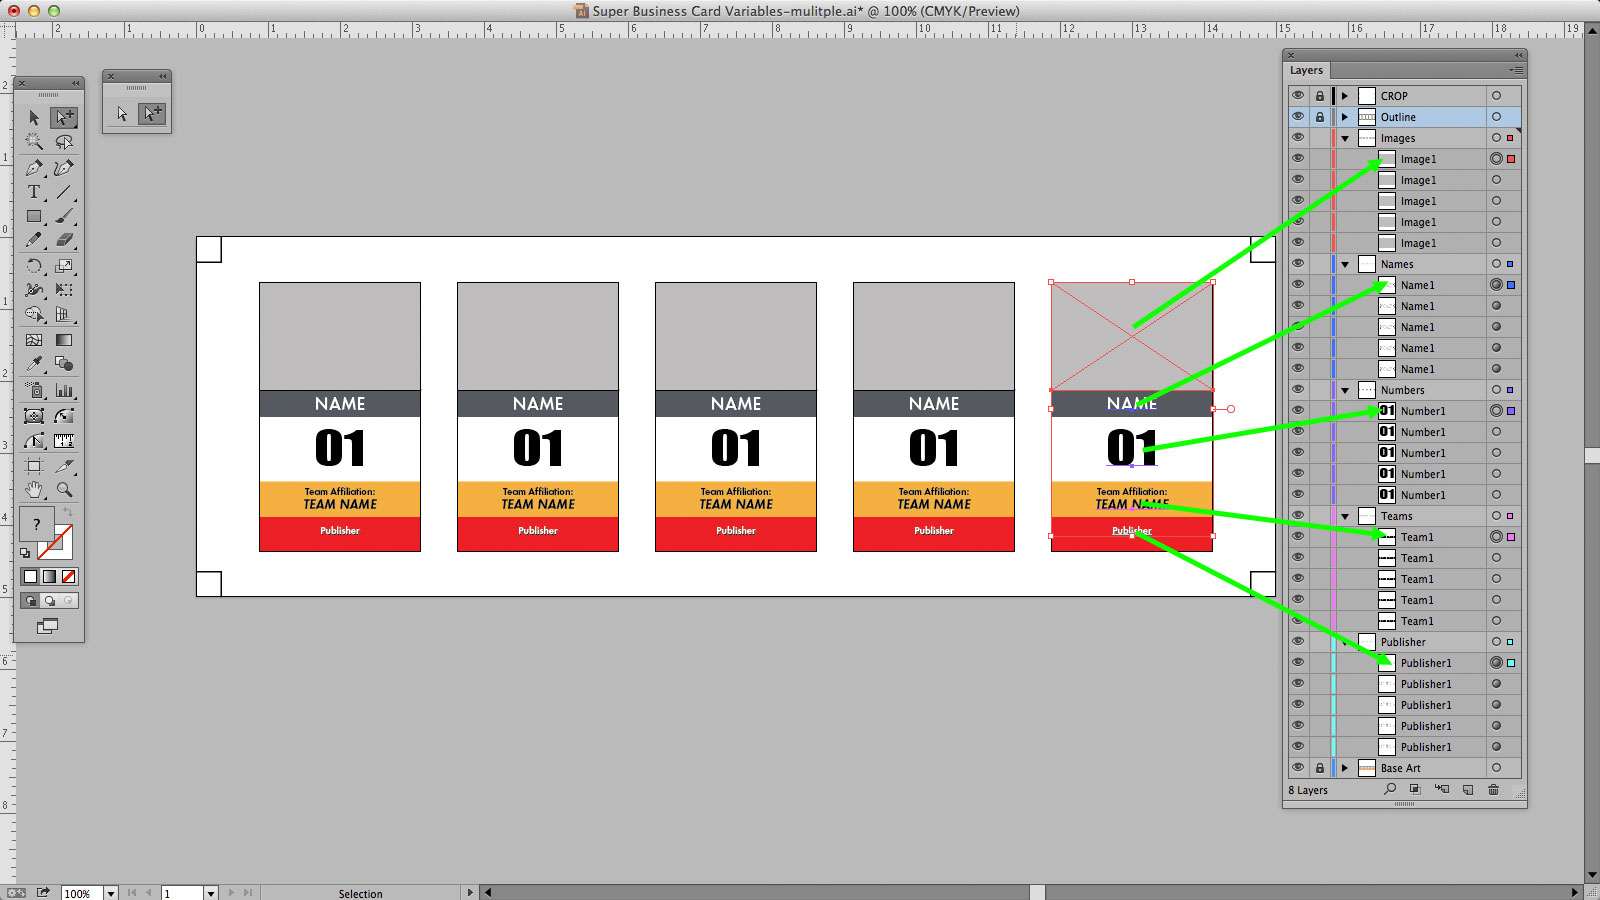
However, when I select the last card graphic I created, which is the one furthest to the right, we can see that the highlighted objects are all on the top of the stacking order on each Layer.
This makes total sense, because when Illustrator creates new objects, they are placed on top of the preceding objects. Therefore, when I created my 4 copies of the original card design, each new copy was placed on top of the last one. That’s why the objects in the card furthest to the right are at the top of the stack in each Layer.
And to demonstrate, here’s a shot of the leftmost card selected, and we can see in the Layers panel that the highlighted objects in the Layers panel are all on the bottom.

So, this makes sense, but unfortunately it’s not ideal for our purposes. When we rename these objects, we’re going to use a text list to do it. That list is (usually) going to start with “1” and increase in number with every line. Since our rightmost object is at the top of the stack in the Layers panel, that means it would become number 1 from our list, and the left card design would become number 5.
To prevent this, all I have to do is select the objects in the Layers panel (it doesn’t matter if you have them selected on the artboard, too), then click the Flyout menu at the top of the Layers panel and choose “Reverse Order”. Then you’ll see the objects quickly reverse themselves in the Layers panel. I’ll do this for all the objects on my Layers that contain variables.

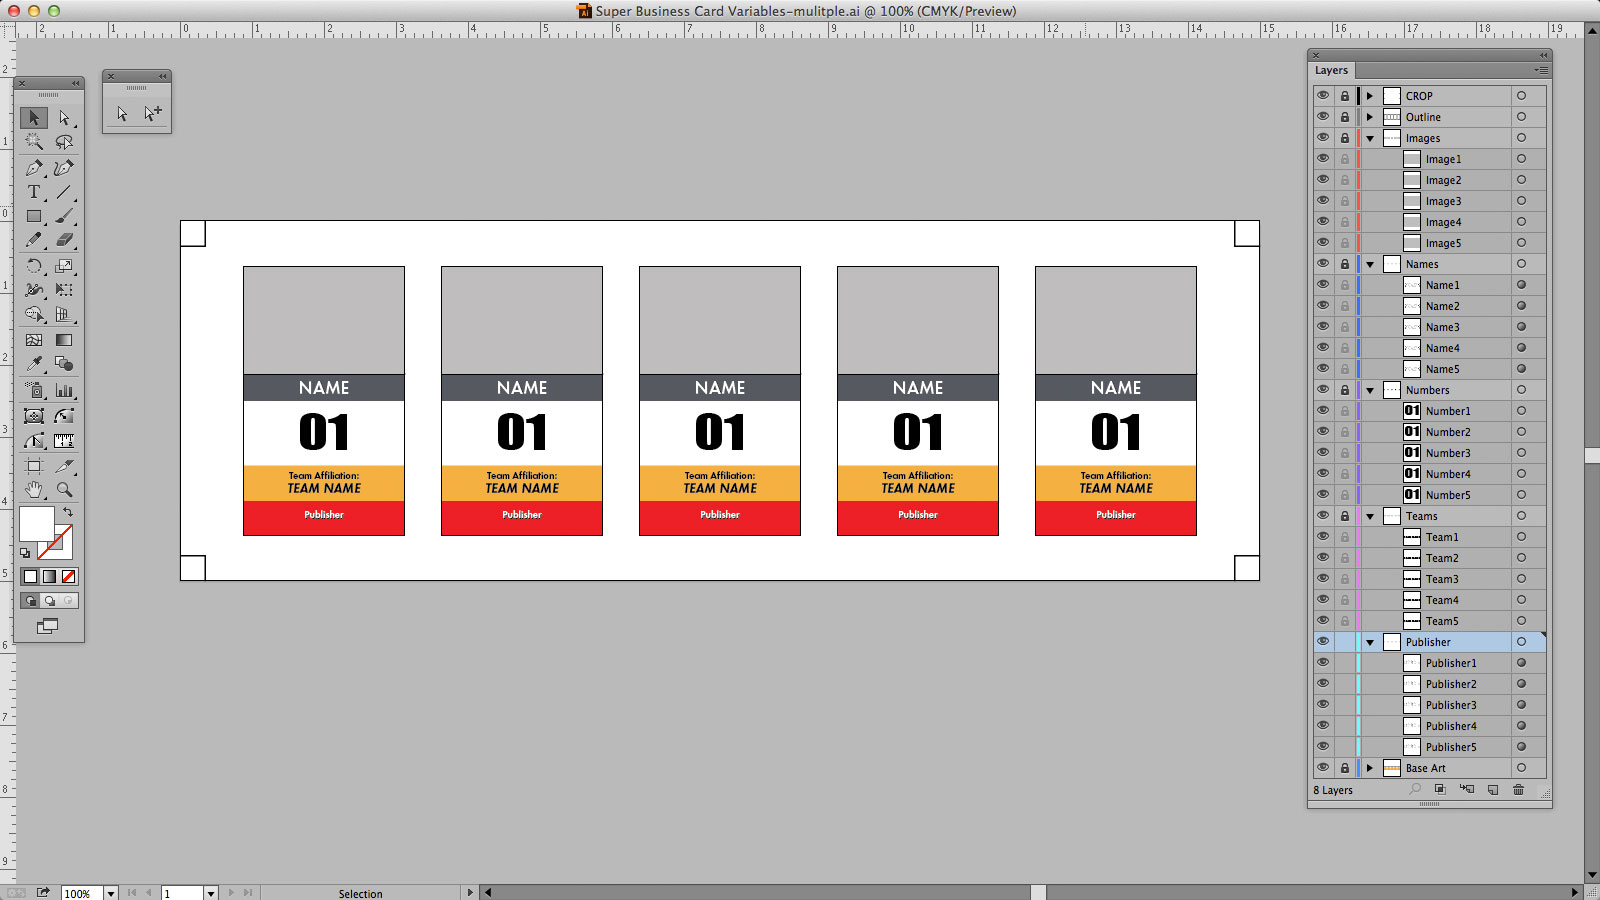
Now if we check my screenshots, we’ll see that the the first objects on the left are all showing at the top of the stacking order, while the objects on the right of the artboard are showing at the bottom of the stack in the Layers panel.


Now, all these objects are ready to be renamed with the script!
Warning: There’s one issue with naming text objects that can cause problems later. When you create a text object, and the text is something like “Box”, you can look in your Layers panel and see that the word “Box” appears on the Layer with the list of objects. However, this is not the name of the object.
This is just a preview of the text that’s on the artboard. You have to manually type something different into the object’s name field in the Layers panel in order to properly name it. If I just typed “Box” again, it still wouldn’t be named. To be sure, just name it something different than what appears on the artbaord. If you change the text on the artboard and the object name in the Layers panel changes with it, then you know it’s not named and you need to manually adjust it yourself.
Usually renaming from a list would take care of this anyway, but just in case one of your text variables doesn’t seem to be working right, make sure it’s object is named properly.
Creating Your Rename Lists With Excel
Even though the RenameArtFromText script only works with an actual “.txt” text file, I still like to make my list with Excel, or in my case, NeoOffice on the Mac.
The reason for this is that I need my object names to be numbered, and Excel/spreadsheet apps are really good at creating sequential numbers.
For example, if we look at the objects on my “Images” layer in Illustrator, we can see that they’re all named “Image1”. So, over in NeoOffice, I’ll just type “Image1” in the very first cell.
Then, with that cell selected, I’ll click the black “handle-dot” at the bottom right of the cell and drag it all the way down to row 5. We can see what that looks like in the following screenshot:

That’s all that’s required here. If I had 30 objects on the page, I’d have to make sure I went all the way down to row 30, but in this case there’s only 5, so that’s it.
As I mentioned above, the RenameArtFromText script only accepts “.txt” files, so I have to get this text out of here and into a text program, since NeoOffice won’t let me save from the spreadsheet to plain text format.
To do this I usually just copy the text and then paste it into TextWrangler on the Mac. You could also paste it into TextEdit on the Mac, too, but make sure it’s in Plain Text mode, and not Rich Text mode if you use that program.
On Windows you can just use Notepad++ and that should work just fine. Save the text file as any name you want. The name of this file really doesn’t matter, only that it has the “.txt” extension.
At this point I have the first rename text file ready to go, but I’ll have to repeat these steps for every Layer that I have variable objects on.
Or, another quick way to create the other files is to run a search and replace in my text program. For example since I already have “Image1, Image2, etc.”, I could just replace “Image” with “Name”, then save the file as “Name Rename.txt” or whatever name I want.
Either way I decide to do it, since I have 5 Layers with different variables, I’m going to need 5 separate files with my new names in them. Once I’m done with those it will be time to jump back into Illustrator and use the RenameArtFromText script
Run the RenameArtFromText Script
Back in Illustrator, when it comes to running the script, I’ll first need to select all the objects on the artboard that I want to rename.
This can be easy or annoying depending on how your file is set up. This part of the method is another reason I take the time up front to separate my variables onto different Layers.
Now, when I want to rename all my “Image” objects, I can just Option-Click (Alt-Click PC) in the Lock column next to the Visibility “eye” icon to the left of my Images Layer name. Option-Clicking toggles the state of all the other Layers in the Layers panel, not the one you’re clicking on. This way I can quickly lock everything else on the artboard except for the objects on that Layer. Depending on the state of the Layers when you first Option-Click, you may have to do it twice to get everything to lock.
So, with everything else locked, I just type Command-A (Control-A PC) to select all, which will be the 5 image objects on my Images Layer, since everything else is locked.
Now with those objects selected, I’ll choose File > Scripts > RenameArtFromText. This will bring up an Open dialogue box where I can browse my hard drive and choose the correct “.txt” file for the objects I’m going to rename.
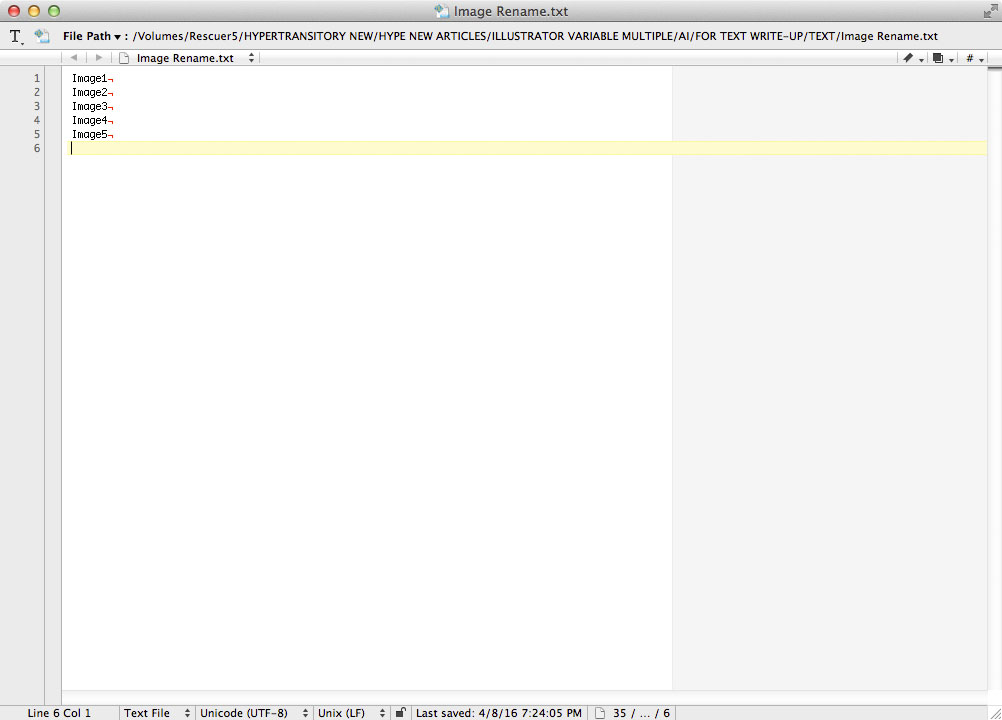
Once I select it and click the “Open” button, the script will run immediately. In a moment, an alert will pop-up letting me know that it is done with “X” amount of names. In the screenshot below, you can see the alert. It says “Done with 6 names” because I had an extra paragraph return at the end of the 5 names in the file (you can see in the last screenshot that there are indeed 6 lines). It doesn’t make any difference if you have an extra line, so don’t worry about it.

Click the OK button to clear the alert, and your objects have officially been renamed. If you look in the Layers panel and your objects still appear to have the same names, just close and open the Layer by clicking the disclosure triangle to the left of the Layer name. This will “refresh” the object names and you’ll see that they have indeed been renamed.

Then, I’ll just repeat these steps for the other Layers in my file, and when I’m done all of my objects will be ready to receive the variable data from my spreadsheet.
By this time, you’re probably thinking this is a lot of work for just these 5 objects per Layer – and actually you’d be right.
Honestly, if I had this few objects I’d probably just name them myself, but I tried to keep things scaled back for this article. I think you can see that if you had 50 objects per layer this would be saving you a lot of time.
And you don’t have to keep everything separated by Layer. If you can keep things organized and in the correct order without using Layers, then that’s fine too. That way you can just create one master “rename list” instead of making one per Layer. It just usually works out better for me to do it this way.
Now that the file is ready, it’s time to get the actual data ready over in our spreadsheet.
Format The Data CSV File
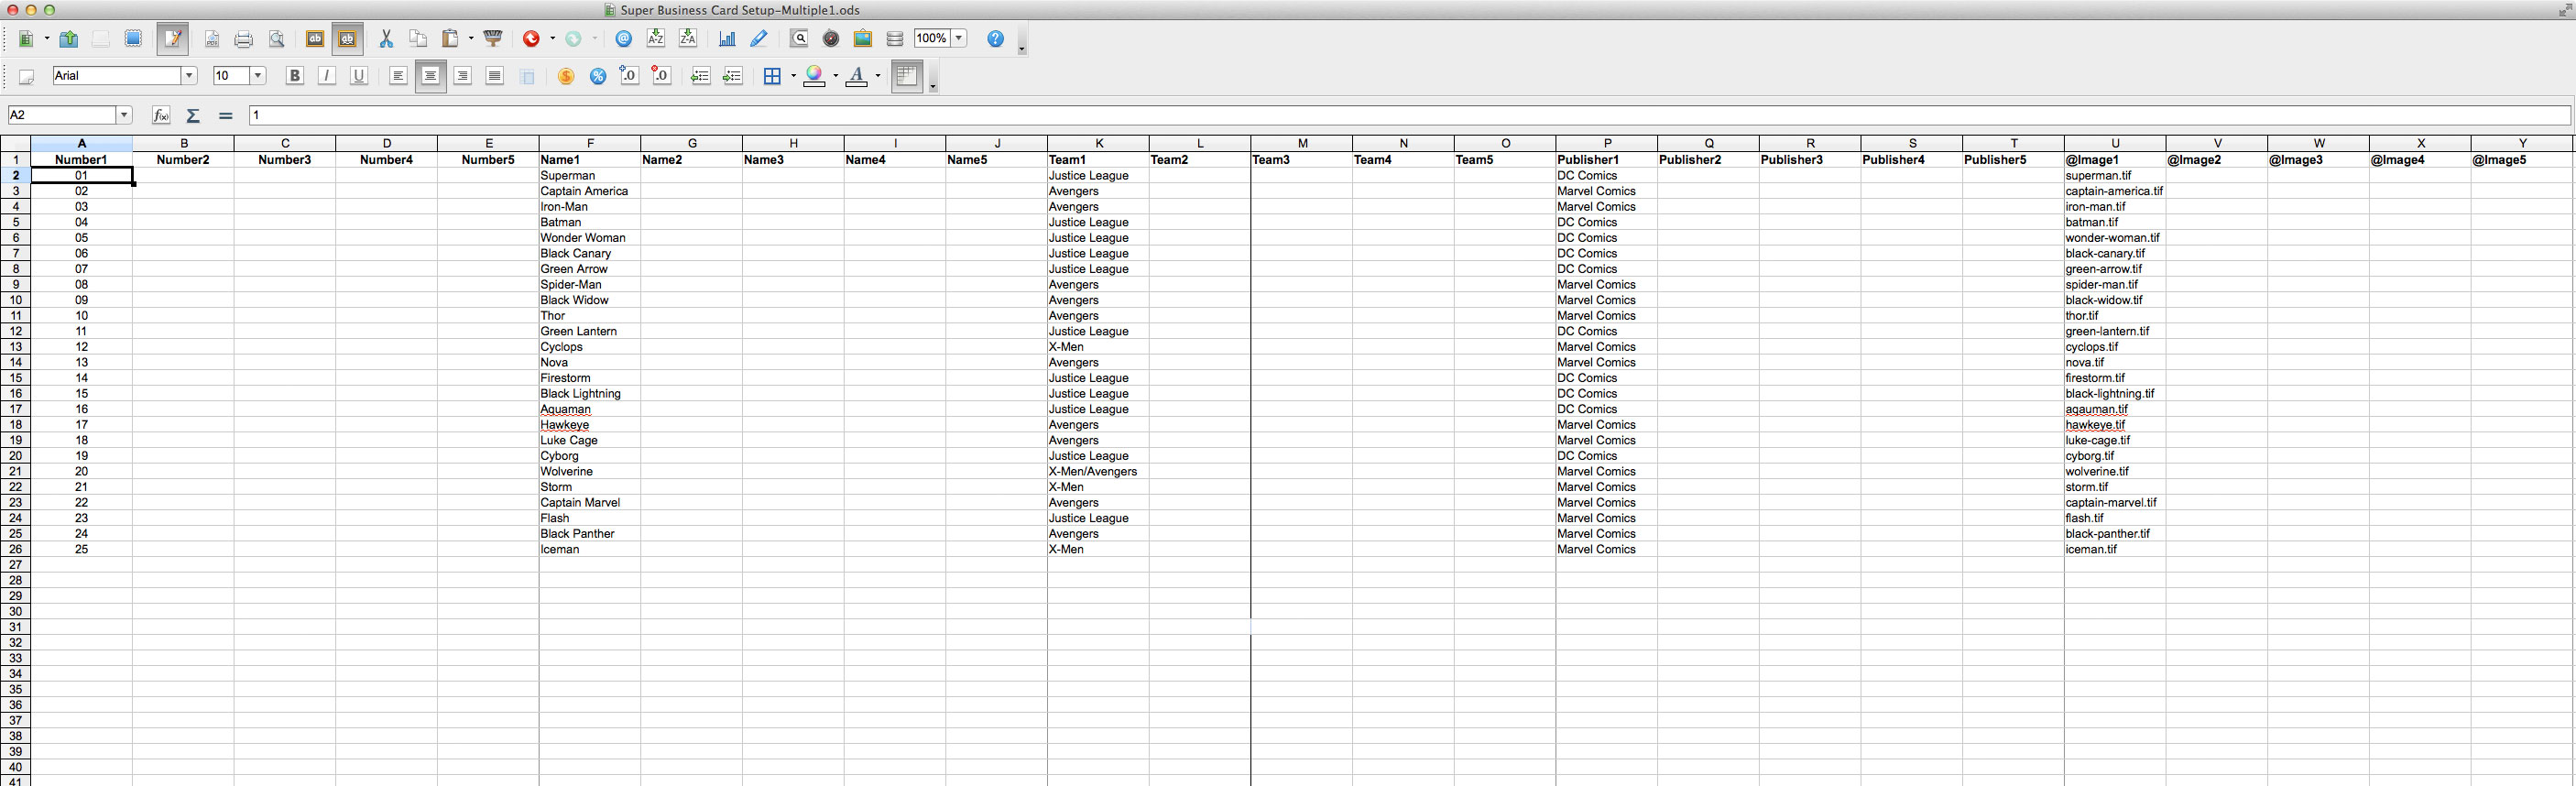
If you followed the first tutorial on using the Variable Importer script, you’ll remember that our spreadsheet file was set up with one column per variable. We can see what that looked like in the below screenshot:

But that way will only work if you just have 1 instance of your design on your artboard. Now that we’re doing 5 at a time, we have to change how this file is set up.
Basically, instead of running vertically, we need to make this data flow horizontally.
In the image above, you can see that we have 5 columns, which matches the 5 Layers that we have in Illustrator. But we need to match the objects on those Layers, since we just spent so much time setting them up.
For example, our first column is the “Number” column (the order of the columns isn’t important, so don’t worry about that). In Illustrator, our Numbers Layer has 5 objects, Number1 – Number5. This means our spreadsheet column headers need to match those objects. So, instead of a “Number” column, I’m going to have 5 columns named Number1 – Number5, as you can see in the below screenshot.

So I just need to see how many objects I have in Illustrator, and that’s going to let me know approximately how many columns I have to have in my spreadsheet. Then, I’m going to name those column headers using the same exact names I used for the objects in Illustrator.
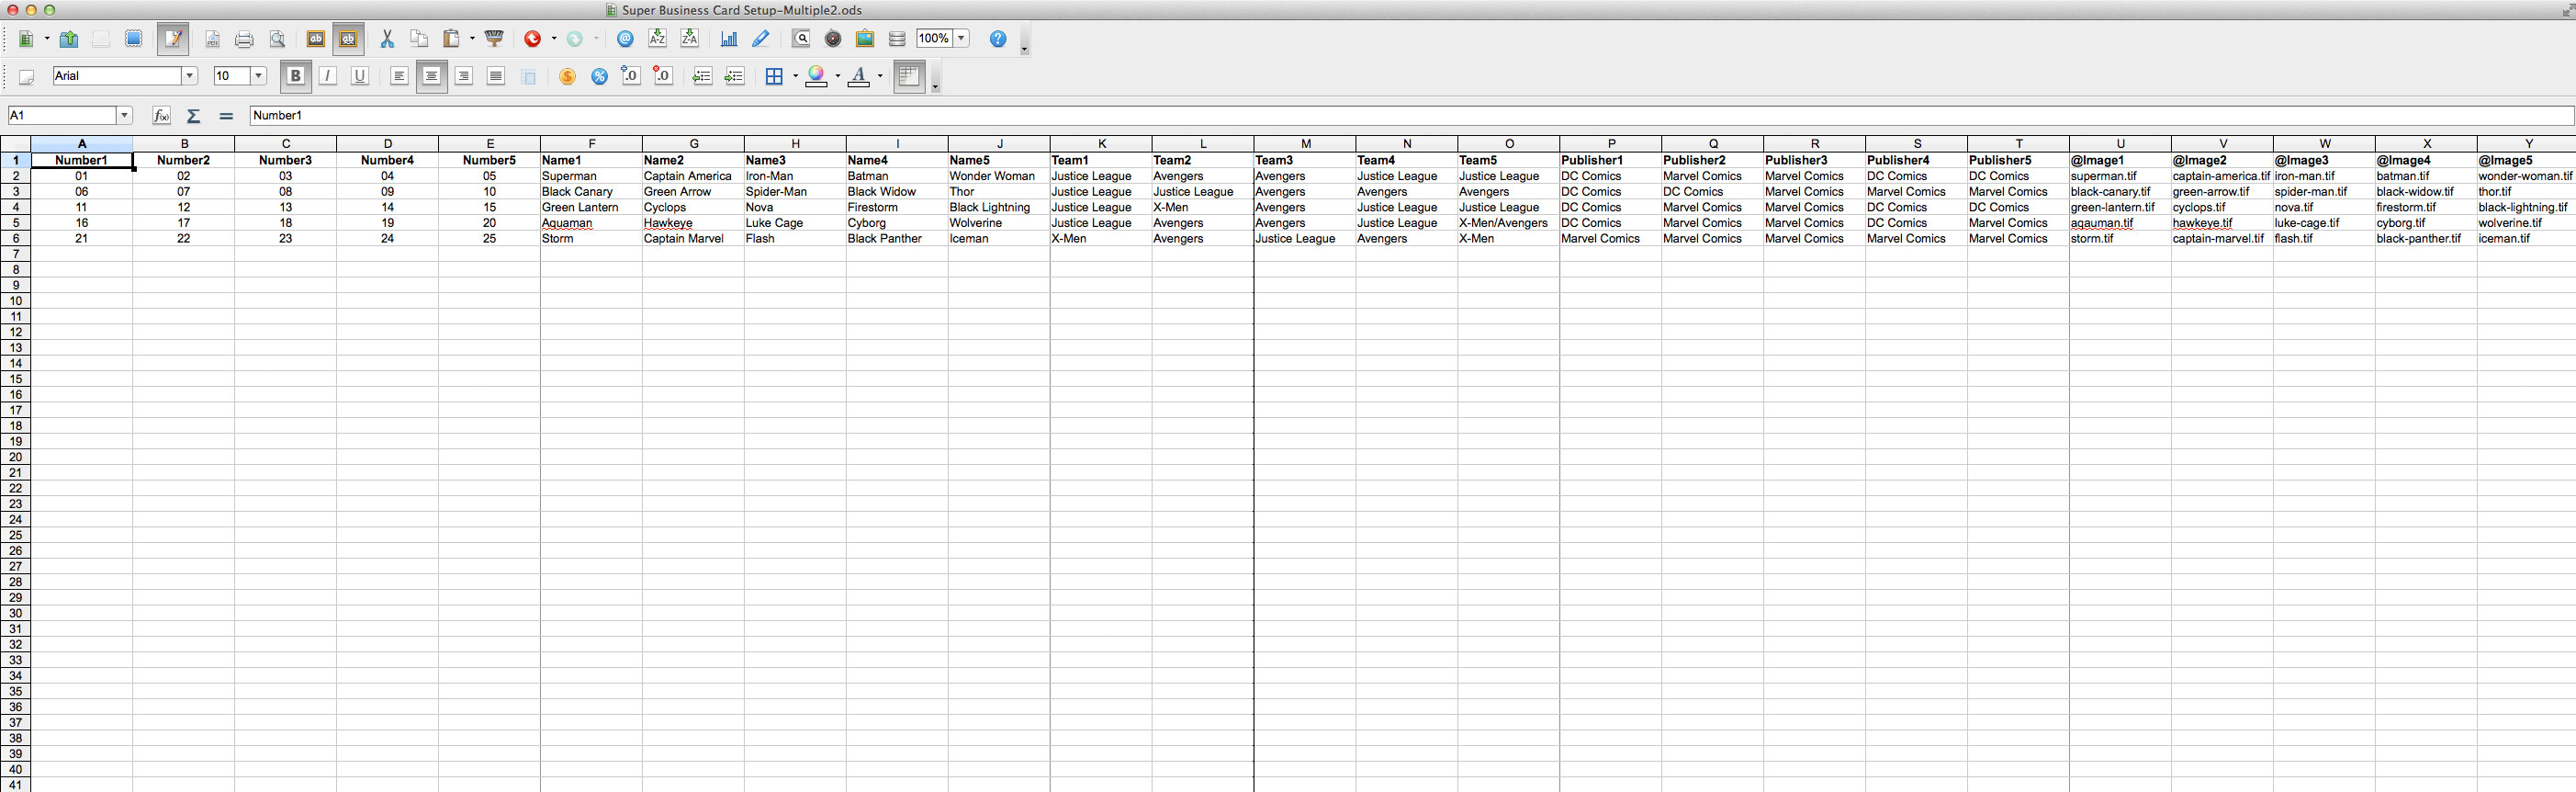
If you check the below screenshot, you’ll see that I now have 25 columns, and that exactly matches the number of (variable) objects I have on my artboard.
So all the column headers are looking good, but now I have to get the data itself to flow horizontally through 5 cells, then wrap down to the next row for each variable.
There’s no “super-smooth/sexy” way to do this, I’m afraid. The best I’ve been able to do is to use the “Transpose” feature of Excel (or NeoOffice in my case) to switch the data from vertical to horizontal.
To do this, first I’ll usually add a few blank rows directly under the headers by right-clicking on the number for row 2, then choosing “Insert Rows” in NeoOffice, or just “Insert” in Excel. Both programs will insert the number of rows you have selected when you do this, so if you select 5 rows, then choose “Insert”, you’ll get 5 blank rows.
I need 5 rows because as we see in my spreadsheet screenshots, I have 25 rows of data, and with my new horizontal header structure, I only have room for 5 columns at a time. So that means I can only paste in 5 at a time, then I have to wrap to the next line. As I have 25 rows originally, it will take 5 rows for me to include it all.
Then, I’ll select the data in the column (just the data, not the blank rows or the header). Then I’ll cut it using Command-X (Control-X PC).
Now that it’s cut, I’ll select the first cell where my data should go, in this case cell A2, then I’ll choose Edit > Paste Special... from the top menu. This will bring up a box with a lot of options in it. Ignore everything else in here, but make sure the “Transpose” button is checked, then click “OK”. This will cause any vertical column data to be switched into horizontal rows, and vice versa.

Right away you’ll see that while this does work, it doesn’t really know you only want to fill 5 cells, so it just fills 25 column’s worth and calls it a day.
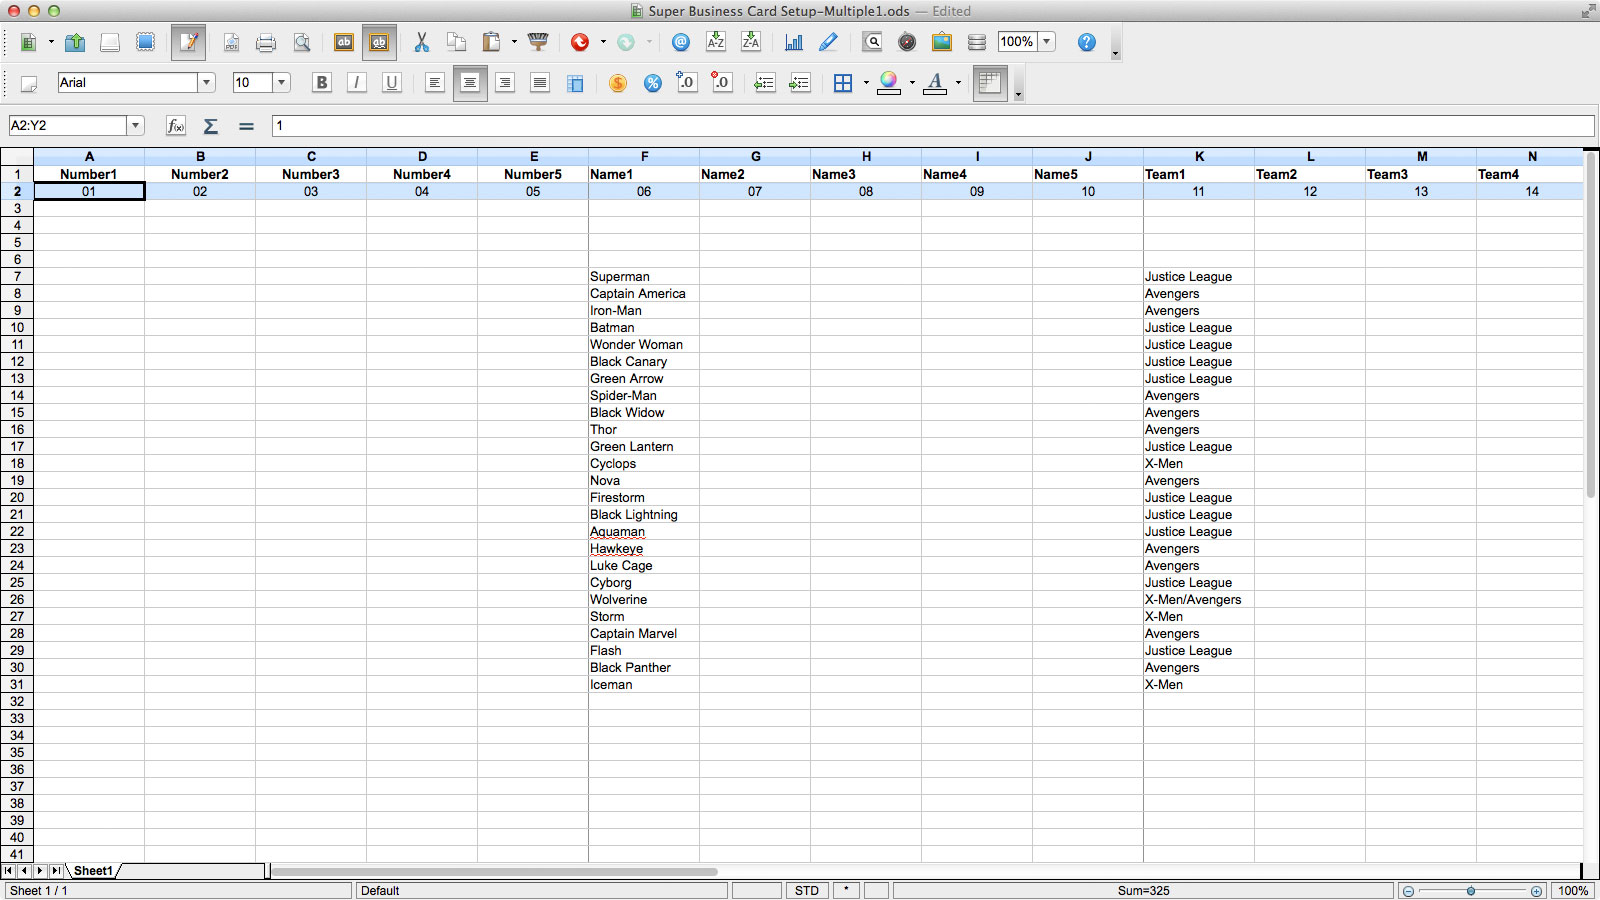
This means I’ll have to manually cut the rest of the overflow from column F to Y and paste it back into column A, cell 3 (you can just cut and paste normally here, no need to Paste Special and transpose again). Then I’d keep repeating this until all 5 rows of the Number variable are filled in. When it’s finished it should look like the below screenshot:

Then of course, I’d have to continue this process with the remaining data until all the columns were filled out. When they’re all done, it would look like the below screenshot:
Now this file is almost ready for importing. All we have to do is save it as a .csv file. In NeoOffice, I would just choose File > Save As... and when the save window appears, choose “Text CSV (.csv)” from the File Type drop-down menu. In Excel, I’d choose File > Save As... and when the save window appears, choose “Comma Separated Values (.csv)” from the Format drop-down menu.
Once it’s saved, we’re ready to head back into Illustrator for the final import.
Run The Variable Importer Script
When we get back into Illustrator, first make sure all your Layers that have variable objects on them are unlocked, so the script can work with them.
In order to match my video, I’m using version 7 of the Variable Importer script, even though version 8 is out by now. The same functions (and more) are in the new one, but the interface is drastically different. I won’t go over every feature in this article, but I’ll point out the ones we want to use to make things easier on ourselves.
To load the script, I’ll choose File > Scripts > VariableImporter from the top menu.
An Open dialogue will pop up, and I’ll just browse to the location of the .csv file I just saved, select it and click the “Open” button to load it.
Once it’s loaded, the Variable Importer interface will appear, which will be familiar if you’ve already seen the original Variable Importer video I made a while ago.
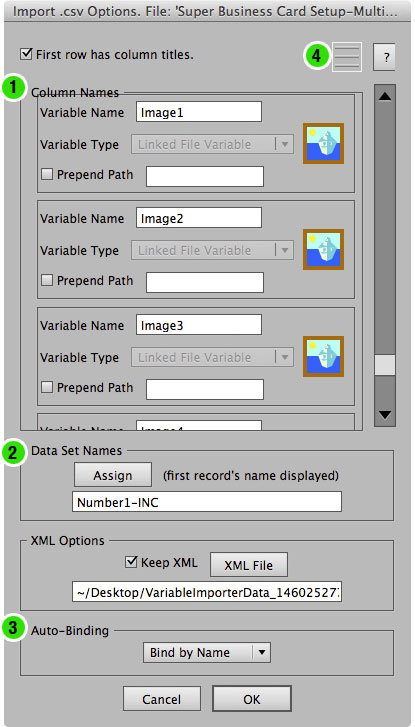
The first thing to do is scroll through the list of variables in the “Column Names” field at the top [1]. This is a good place to check if your variables are being loaded correctly.
We can see the names of the headers we created in the spreadsheet listed here. If you ever see any listed as “Variable1”, “Variable2”, etc., that means that particular variable wasn’t loaded correctly. For example there would be an error if a header name had a space in it, or a disallowed special character (only 3 special characters are allowed, and they must precede the header name – # for visibility, % for graphs, and @ for images).
If I scroll to the bottom, those last image variables have a different icon, and the Variable Type is listed as “Linked File Variable”, which denotes that they represent image variables. We can see in the earlier spreadsheet screenshots that I placed the “@” symbol at the beginning of those header names. That’s how the Variable Importer script knows how to treat these variables. I could click the “Prepend Path” button for each of these images variables, and choose the folder where all the images are stored, but there’s a better way for us to do that which we’ll get to shortly.
Underneath the Column Names window, in the “Data Set Names” field [2], you could click the “Assign” button and further customize the data set names. This is important if the names of the files we’re going to export from Illustrator actually matter to you. In some workflows they don’t matter at all, and sometimes they can be critical. Luckily, the script gives you lots of options here.
At the bottom, the “Auto-Binding” section [3] is very important. Here we need to make sure the “Bind By Name” drop-down is selected – and for good reason. The beginning part of this article was all about renaming our Illustrator objects just for this specific purpose, just so we could tell this script to look out for those names and bind the variables to them when it imported.
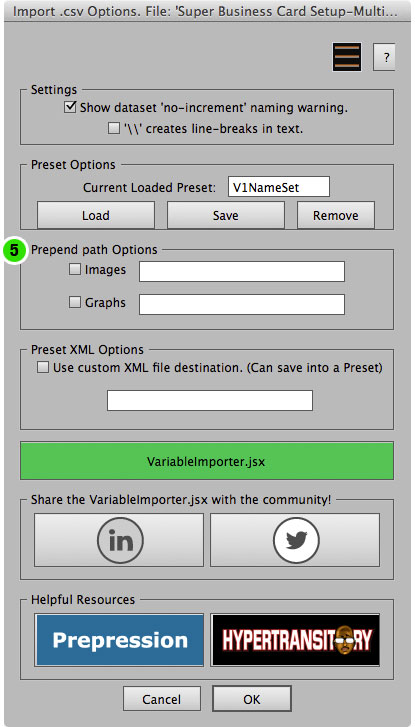
With that done, we’re finished in the main screen. Now we need to click the Settings “hamburger button” at the top right of the screen [4]. This will take us into the options for the script.
The only thing we’re going to deal with when we get into the settings is the “Prepend path Options” section [5]. If I click the “Images” checkbox here, I’ll have the opportunity to choose the folder where my images reside. When I do this, it will set all my image variables to use this folder. This way I don’t have to click all 5 image variables and choose the folder over and over.
When that’s done, to start the import I’ll click on the “OK” button at the very bottom, and the script will begin importing.
The speed of the import varies with the amount of data and objects on the artboard that it has to bind to, but it usually goes pretty quick. When it’s finished, we’ll see an alert pop-up that says:
“Data Sets imported from .csv file ‘Super Business Card Setup-Multiple.csv’ have 25 variable names and 5 records.”

Click the “OK” button to dismiss the alert, and we should see our designs become populated with the data from the spreadsheet. If you don’t already have it showing, this is a good time to open up the Variables panel by choosing Window > Variables from the top menu. When it’s open, you should see that the Variables and Objects columns are already filled and bound, courtesy of our earlier renaming and using the “Bind by Name” option of the script. We can see this shown in the below screenshot.

If we hadn’t used the automatic “Bind by Name” feature, we’d have to use the Variables panel to bind each variable to an object manually. Consider how tedious it would be to bind just the 25 items we have here. If you had hundreds of objects to bind, the time it took to do it could quickly become prohibitive.
But, since we did use the Bind by Name option, that work is already done. This is a good time to click the arrows to the right of the Data Set name in the Variables panel and switch through each data set just to make sure everything imported the way it should.
Export To Separate Files
I went into detail on how to export your datasets out as separate files in my last video, so if you need the specifics on that please head back and watch the video, or even quicker read the write-up I made for it. For now I’ll just list out the basic steps:
- Create new action with the Actions panel.
- Record yourself Saving or Exporting to the file format you need.
- Run a “Batch” from the Actions panel. Choose the action you just made.
- Choose Data Sets from the “Source” drop-down menu.
That should give you the broad strokes of it all.
In the last tutorial, I had 25 rows of data, and that meant I would end up with 25 separate files.
This time, we end up with 5 rows of data, with 5 instances of the design up on the artboard. That means we’re going to end up with 5 files when we’re done.
At that point, that’s all she wrote! You’ve successfully set up multiple designs on the same artboard. Admittedly, it’s not as automated as InDesign’s Data Merge, but if you’re already invested in an Illustrator workflow, most of the time it’s much better to do it this way than convert your whole design over to InDesign for Data Merge.
Multi-Import Bonus Round
Before I go, I’m going to mention something I didn’t talk about in my video.
When I first made the video, Vasily (the Variable Importer script developer) contacted me and asked:
“Hey, why didn’t you just tell people to re-import all the single files they exported back into a ready-made ‘linked file’ template using the Variable Importer?”
And I thought…”Oh. Crap.“
Here’s the thing: I used to do things that way at first. I would spit out 100 files, then I’d quickly make up a .csv of all those exported files, then have an Illustrator template ready with linked placeholders where I could just import them all. It does work. You can import your exported eps/pdf/tiff/png files with the Variable Importer script, just as you would any other linked graphic.
The only thing is, in my workflow, I tend to need things to be more abstract. Meaning I like to keep things as editable as possible. When I export a bunch of eps files or tiffs, importing them back in as linked graphics means if I need to change something, I have to go all the way back to that file and fix it, then re-link it.
I found it was too many steps for me. That’s why I decided to start putting a little more work in upfront, and setting up my whole sheet with crop marks, cutlines and all. That way I can eliminate an annoying few steps after my batch export.
Now I already have those files set up as template, and when it’s time to import, I just quickly set up my .csv file with the new data (of which I have a template ready for, as well) , import, and when I run my batch the print-ready files are ready to go (after proofing, of course).
However…just because the “re-importing” workflow doesn’t really work for me, that doesn’t mean it’s not a valid workflow for someone else.
Sometimes you’ve gotta send all those single PDFs to the client for approval, or maybe your RIP prefers to receive single files and it sets the layout and trim marks “auto-magically”. Or maybe you just would rather do it that way. For those reasons I thought it best to at least mention the possibility here, in case some didn’t realize they could do that. My way isn’t the only way…!
The Wrap Up
So we’ve come to the end of another Adobe Illustrator variable data tutorial. I know it seems like a lot, but once you get these steps down you’ll be breezing through this stuff like nothing.
For a final announcement, earlier I mentioned that version 8 of the Variable Importer is already out. Well, I’ve actually created a video course that walks through all the bells and whistles of using that new script for variable data, and it will be available on Lynda.com very soon IT’S HERE! So those of you interested in checking it out can get more info on the Adobe Illustrator Variable Data Lynda.com course at that link.
With that said, I’m gonna get outta here for now, and I’ll see you guys later!
Thanks so much for the tutorial! I’ve successfully created the datasets, but can’t get the Batch save to work. When I choose “Source : Data Sets”, and then go to choose “Destination: Folder”, it doesn’t allow me. The only viable option is “Destination : None”. When I try to choose the “Override Action “Save” Commands”, it just keeps saving over the same file instead of incremental files no matter which “File Name” option I choose. Any ideas? Thanks in advance!
Hi Sara,
Yes it should be on Destination: None, then you choose your folder directly underneath that. So that *should* be working.
Which version of Illustrator are you using?
Also, are you renaming the file when you save the action in any way? Sometimes that can trigger an issue.
Are you using “Save As…” or “Save as Copy…”? One or the other may work.
Which version of the VI are you using? If you used “Data Set Names” and used a strange combination of variables to create the names it may be an issue.
If none of this helps, is there any way I can see the actual files? I might be able to spot what’s going wrong…
I figured it out – the file name had a couple extra “.” in it besides the .eps which was causing problems. Once I changed them to “_” it worked!
Thanks for your reply!
Would you know how I can add a trademark logo on to a product on my Excel sheet and still be able to be recognized on Illustrator? Thank you!
Hi Pratik. You mean you just want to add a “TM” at the end of a product name? Or are you talking about something else?