I’ve recently become fascinated by the Marvel Comics character Daken.
Daken is Wolverine’s biological son, and has very similar powers to his father. The differences between the two are profound. Where Wolverine is a hero, Daken has been raised to be a brutal, amoral killer who has no end of ambition.
Sounds like the kinda guy I’d like to create in 3D.
Derivative Knock-Off Character
Although I hated this character at first for being so derivative, I eventually had to admit that I looked forward to his appearances. When he got his own comic, I bought every issue (I understand it’s now cancelled, though).
One weekend when I should have been working on something else I started screwing around on a drawing of Daken, which you can see here (still unfinished):

After that I thought, how difficult would it be to make this character in 3D using Daz Studio?
Well, despite the apparent simplicity of his costume, it turned out to be more difficult that I thought.
Starting out: Daken Building Blocks
Disclaimer: (a minor amount of Blender modeling was done for this figure, so don’t hate me :P). Also, I’ll try to keep this one as short as possible, those of you who are into this sort of thing can always contact me or leave me a comment if you have any questions.
If you’re familiar with Daz Studio or Poser type applications you already know that you don’t create the figures from scratch, you load up pre-made models and items, then pose and light them however you choose.
I’ll outline the steps I took to make Daken in 3D…
Loading the base figure:
So the first thing I was going to need was a figure.
1. Add the Michael 4 figure from Daz.
http://www.daz3d.com/i/shop/itemdetails/?item=7877
This is the figure I usually use for my work. The Michael 4 figure is free and can be used as a base that you can modify to your own purposes.
2. Add the Lee Elite Texture.
http://www.daz3d.com/i/shop/itemdetails/?item=9676
The Elite Texture Series from Daz is a series of morphs that change your stock Michael (or other base model from Daz) into a brand new figure.
In this case I chose Lee because this is an Asian model and Daken is actually half-Asian. I know he’s hidden under his mask but I just wanted to do it anyway.
Adding the clothing:
With the Michael 4 figure loaded and morphed into Lee, it was time to put the costume on him.
3. Add M4 Bodysuit.
http://www.daz3d.com/i/shop/itemdetails/?item=8361
The M4 Bodysuit is a really versatile piece of clothing. It fits all over (except for hands and feet), so really all I had to do was change the texture from the default one to something that I created.
4. Gloves. For the gloves, I didn’t need an extra props, all I had to do was change the texture of the hand from the default to my own texture.
5. Boots. This was a little more effort than the gloves. I couldn’t just change the foot texture, since the toes would still be separate. I did find some boots that would do the trick, but they were too expensive for this hobby project.
I eventually settled on these, which I found for free:
http://www.sharecg.com/v/50203/view/11/Poser/M4++-Spidey-Socks
After loading them, I again changed the texture to one matching the bodysuit and gloves texture.
6. Wrist/Shin bands and belt. I wasted a lot of time searching for wrist and shin guard accessories that I could use for Daken’s costume.
Eventually I realized all I had to do was use the “texture regions” feature of the M4 Bodysuit, which actually worked perfectly. Many products from Daz have their own “Template Texture”, where the 3d model is mapped out onto a 2D space so you can add your own textures.
If you check this image you’ll see the “regions” for the M4 Bodysuit:

I created the texture of the bands in Photoshop. I found an image of some bandages and cut out strips like this:

Then I opened up the M4 texture template and loaded them up for the target areas. Check this image for how it looks:

Finally, to give that area a bit of a different feel than the rest I made a bump map image. This actually affects the way the light interacts with the texture. Usually it’s a grayscale image where the brighter parts are higher or closer to the camera and the darker parts are further away. It looks like this:

Cowl Calamities
7. Mask. This part was really difficult. Daken’s mask is pretty distinctive, so I knew I wouldn’t find an exact match.
At first I was going to try to make the mask out of the actual face texture for the model, but I didn’t like the way it looked so I scrapped that idea.
I used this prop called the M4 Eared Cowl instead:
http://www.sharecg.com/v/46566/related/11/Poser/M4-Eared-Cowl
Most of it fit pretty well, and there was a morph included that let you use the mask without the ears on top. Very cool.
Except I had to change the coloring of it. This is where things went south.
Most of the time, the Daz-issued models have a texture template you can use to add your own materials. This M4 Eared Cowl didn’t really have that, so I was forced to make my own.
I did this by selecting the Mask in Daz Studio, then choosing UV View from the camera view pulldown menu. To the right of that I made sure ‘View by Node’ was selected (check the red areas of image to see where you need to choose this). This way it will show me a kind of map of the surface of the mask.

As you can see, it doesn’t look very intuitive and it’s kind of random. I don’t think the creator of the cowl prop really thought about people going in and changing the textures themselves. Which is just fine, I’m only grateful I found the thing.
It did turn out to be rather challenging to add my own texture though. I’m still not quite happy with how the mask turned out, but it will do for now. Especially for free, since it must have been a decent amount of work to create this and have morph options and such in there.
ADDING PROPS
8. Strap and pouch. Finally, I had to get Daken’s shoulder strap in there. After a bit more searching I found something suitable in a prop called the M3 Scout:
http://www.daz3d.com/i/shop/itemdetails/?item=3783
I didn’t need anything but the pouch, so none of the other props made it into the file. You probably noticed this one is for M3, while I’m using M4. In this instance it’s not really a problem.
Because it’s actually meant to fit to an M3 figure, it doesn’t automatically fit and follow the M4 character through all the different poses. It’s a minor amount of extra work to keep shifting it around separately, but not a dealbreaker.
9. Claws. This was another piece where I had difficulty finding something suitable, so I went and made those in Blender, then imported them into Daz to place on the figure.
Luckily they were pretty simple shapes so I didn’t have any trouble modeling them from scratch in Blender.

POSING AND LIGHTING IT UP
So once all the grunt work of creating the look of the figure is done, then it’s time to pose him and light him.
I usually start with applying one of the base poses that come with the M4 model, then make changes from there to get what I want.
For the lighting, I actually use the cartoon rendering mode, so all I do is add one Distant Light (it’s a light that emits parallel rays), and place all my textures in the Ambient channel (in the Surfaces tab).
The I turn off all Diffuse and Specular color and strength so that all that’s left is Ambient.
This will give me a very flat render like so:

To add shadows and depth, I’ll then remove all the textures and strength in the Ambient channel, then turn up the Specular to 100%. Now I can change the angle of the Distant Light in the scene to get some stark shadowing for the figure.

I’ll take four or five renders of different shadow angles just to be sure.
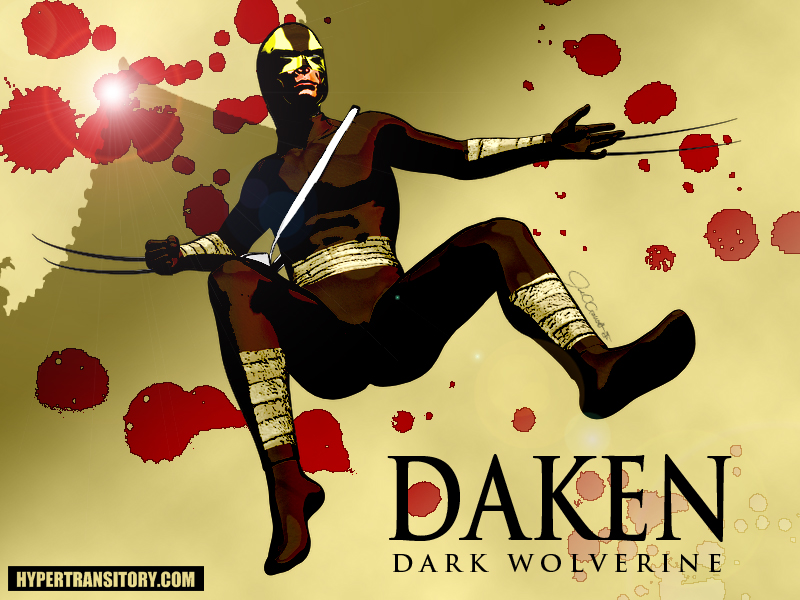
After getting all my renders, I’ll bring those all together in Photoshop, pile them all on top of each other in layers then play around with the layer modes and opacities until I get an image I like.
The text and background image were added in Photoshop as well. The blood spatters were created using a free brush set I believe I got from an issue of ImagineFX Magazine.
So anyway I’ll wrap this up here but if anyone has any in-depth questions feel free to leave them in the comments or email me from my contact page.
Oh yeah, I tend to debut this stuff on my Hypertransitory Facebook Page before it shows up here so go ahead and like that page to see these things early. Here’s another 3D one I posted on FB recently. Enjoy!

Hi there,
I just happened to be browsing and this caught my eye. My son is a Wolverine fan, and my husband is a fan of Marvel in general. I will definitely pass this along to them to see if they want to experiment.
Thank you!
Well you’re welcome, Kathy!
If your son is into Wolverine no doubt he already knows all about this character :)
Thanks for commenting and for sharing with your family!
My brother like Wolverine. I’ll definitely share this to him! Great work!
Hey Andy, thanks for the compliment and thanks for checking this out!
I love Wolverine! This is amazing! I wanna try making this! You’re such a great artist!
Thanks, Will! I’m glad you enjoyed it. If you make it drop a link and show it off sometime!
Nice job! I wonder how much time it took You to create something like this??
Thanks, Jane! It probably took me about 5 hours total, but only because I wasted a lot of time looking for the “perfect” props. Once I gave up on that and decided to just apply textures instead it went pretty quick.
I’d say without the sidetrack it would have taken me about 2 hours start to finish.
Ah, this reminds me of my good ol’ days with Poser 4. It was pretty fun, but I never was able to manage the really fun rendering that you got going on here. It’s pretty fantastic! =)
My boyfriend is a diehard comic book fan, and I’m often subjected to long diatribes about Marvel and DC characters and plotlines. The darling man, he doesn’t notice when my eyes glaze over, lol. Not that I don’t appreciate comics, just that I don’t know all the characters and histories he does, and the man does love talking about his comics! =)
This looks fantastic, though. You definitely have tons of patience, my friend, and a really good eye. I love the texture on those bandages.
Delena
Hah! I’ve learned to be on the lookout for the dread “glazed eyes” look :)
Oftentimes I’ve wondered “how can people NOT be interested in the origin of Spider-Man’s black costume? it’s absurd!”
Oh well. I’ve learned to accept other people for who they are lol…
thanks for dropping in here and commenting, it’s always appreciated!
I love seeing your sketches from start to finish. Was this also influenced from First Class that’s coming out tomorrow? I know I’m anxious to see it!!
Oh man I haven’t seen First Class, yet…I knew I was forgetting something! so did you check it out?
Hey, very cool John! I didn’t know that Wolverine had a son! I should show my son your comic, he would really love them. Do you have any published comics out?
hey Uri,
I don’t really have any published comics out on the market, but (almost) everything I have can be found inthe comics section here:
Hypertransitory Comic.
I hope your son gets a kick out of them. Thanks for commenting!
Marvel’s characters are always awesome! I love wolverine too. An your touch on the 3D design is awesome too. I want to make one like that. How do you learn it??
great pictures there. you are such an artist. :)
Hi, John,
wow, I must admit I do not know much about 3D creating, but you sure gave here some intriguing detailed steps. Will you also put the drawing in some other post after you finish coloring it? Or it will stay like that? I think it’s cool.
Very impressive work! I’m amazed with these drawings, you are very talented. Technology is such a great thing to have, when added with talents like yours, it could lead to more amazing things. Have you considered making comic books in the future? or are you already doing some?
You are a great artist indeed! How do you really do this? You have great stuffs here.. Be back for more..
Thanks for the compliment Sally!
Nice tutorial on how to create Daken… Daz Studio 3D is that Poser human framework program correct? Have you tried it in Maya?
Anyways, it looks good man. A++
Thanks Thomas!
Yeah Daz Studio is essentially similar to Poser. I’ve never tried Maya (a bit out of my price range), btu I’m getting back into Blender, a powerful (and free) 3D modeling/etc. program.
Thanks for the compliment and thanks for commenting!
Wow, I was not aware that so much went into making a comic.
hi Karen, yeah it’s a bit of an ordeal! that’s why they have a whole team doing it usually lol
How cool! What a neat process, what happened to the old days of pencil and paper? Lol. I’ve never heard of Daken but I like Wolverine (though I didn’t read the comics but love the Xmen movies). Who was Daken’s mother? Probably someone I’m not familiar with but just curious.
Hey Rosie! Yeah the times are a changin’ aren’t they??
Daken’s mother was a woman who was killed by Captain America’s ex-partner (he was brainwashed), so she’s not around at this point in time. She was someone they made up to tell the tale, and then kind of dismissed from the story lol
My friend and I were talking about how it kinda sucks how all animation is on computers now, we were talking about Animaniacs and all the cartoons we watched as kids. I mean it’s cool what you can do with comps now, but I feel like this stuff lacks some personal touch sometimes.
I do miss the hand drawn cartoons, but I’m just glad I didn’t have to do any of that stuff, lol! it was painstaking work and I’m too lazy for all that :)
Great talent! Me and my little bro love wolverine character :) He’ll surely love your work :)